Brown Sugar Garlic Chicken Thighs
Juicy chicken thighs glazed with brown sugar, garlic, and soy sauce in one pan. A sticky-sweet weeknight dinner ready in 30 minutes. Get the recipe.
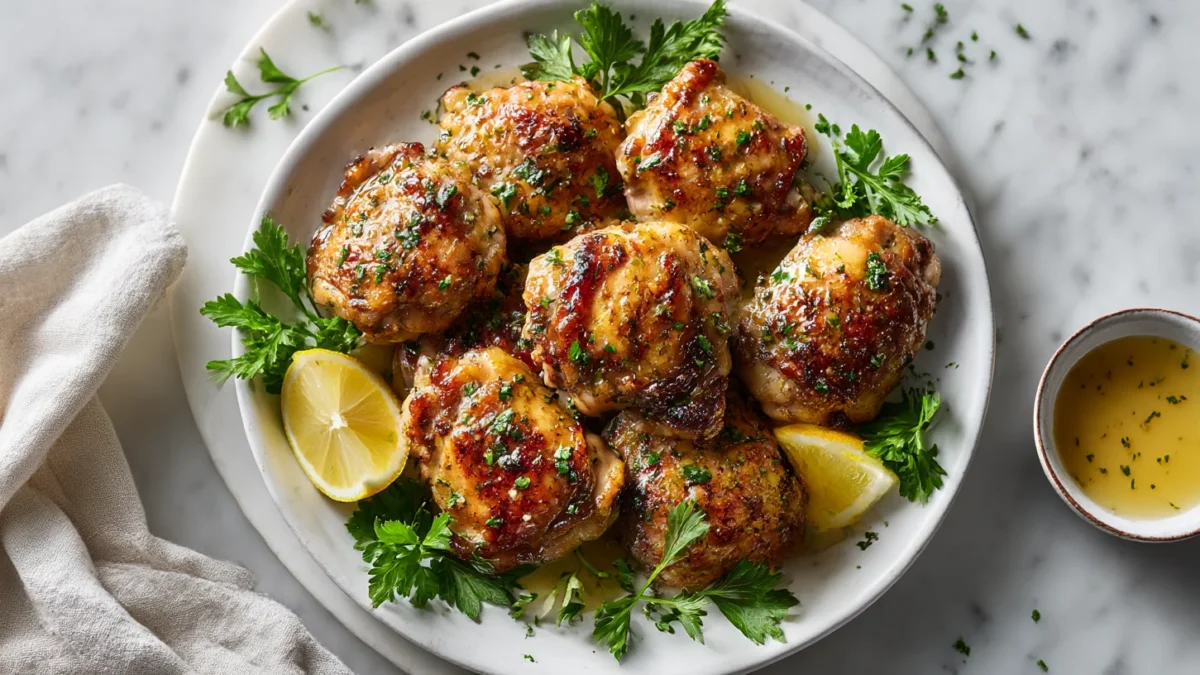
Brown sugar garlic chicken is the weeknight dinner that tastes like you tried way harder than you did. Chicken thighs get seared until the skin is crackling, then glazed with a sticky sauce of brown sugar, garlic, and soy sauce that caramelizes in the pan. Twenty-five minutes, one skillet, and you’ve got something that rivals any takeout.
Why You’ll Love This Brown Sugar Garlic Chicken
- Ready in 25 minutes — faster than delivery
- One pan means minimal cleanup
- The glaze is sweet, savory, and slightly sticky — kids go crazy for it
- Chicken thighs stay juicy even if you slightly overcook them
- Pantry staples only — no special shopping required
Ingredients
- 8 8 bone-in, skin-on chicken thighs (About 3 lb total. Thighs are forgiving — they won't dry out like breasts.)
- ½ cup ½ cup dark brown sugar, packed
- 6 6 cloves garlic, minced (About 2 tablespoons)
- 3 tbsp 3 tbsp soy sauce (Low sodium preferred)
- 2 tbsp 2 tbsp rice vinegar (Apple cider vinegar works too)
- 1 tbsp 1 tbsp sesame oil
- 2 tbsp 2 tbsp unsalted butter
- 1 tsp 1 tsp red pepper flakes (optional)
- Salt and black pepper
- 2 2 green onions, sliced (For garnish)
- 1 tsp 1 tsp sesame seeds (For garnish)
Equipment
- 12-inch cast iron skillet or stainless steel pan
- Tongs for flipping chicken
- Small bowl for the glaze
- Instant-read thermometer (optional but helpful)
How to Make Brown Sugar Garlic Chicken
Step 1 — Season the chicken (3 minutes)
Pat the chicken thighs dry with paper towels — this is the single most important step for crispy skin. Season both sides generously with salt and pepper. Let them sit while you make the glaze.
Step 2 — Make the glaze (2 minutes)
In a small bowl, whisk together the brown sugar, minced garlic, soy sauce, rice vinegar, sesame oil, and red pepper flakes until the sugar dissolves. It’ll look thin — that’s fine. It thickens dramatically in the pan.
Step 3 — Sear the chicken (10 minutes)
Heat a 12-inch skillet over medium-high heat. Add 1 tbsp of the butter. When it foams, place the chicken thighs skin-side down in the pan. Don’t move them. Let them sear undisturbed for 6-7 minutes until the skin is deep golden and releases easily from the pan. Flip and cook for another 3 minutes on the other side. The internal temperature should be at least 165°F.
Step 4 — Add the glaze (5 minutes)
Reduce heat to medium. Pour the glaze into the pan around the chicken (not directly on top — you want the skin to stay crispy). Add the remaining 1 tbsp butter. Let the sauce bubble and thicken for 3-4 minutes, spooning it over the chicken occasionally. It should coat the back of a spoon and look like caramel.
Step 5 — Finish and serve
The glaze is done when it’s thick and sticky and the chicken is deeply glazed on all sides. Transfer to a platter, spoon any remaining pan sauce over the top, and garnish with sliced green onions and sesame seeds. Serve immediately.
Pro Tips
Don’t move the chicken during the initial sear. Let the skin get deeply golden before flipping — if it sticks, it’s not ready yet.
If the glaze starts to burn before the chicken is cooked through, lower the heat and add 2 tbsp of water to the pan.
Bone-in, skin-on thighs are non-negotiable here. Boneless skinless will overcook before the glaze develops.
For extra garlic flavor, add 2 whole smashed garlic cloves to the pan during the sear. Remove before serving.
Variations & Substitutions
Spicy version: Add 1 tbsp gochujang (Korean chili paste) to the glaze for a sweet-heat twist.
Pork chops: Substitute 4 thick-cut bone-in pork chops. Sear for 5 minutes per side.
Sheet pan version: Sear the chicken, then finish on a sheet pan in a 400°F oven for 10 minutes while the glaze reduces on the stovetop.
Cauliflower: Use thick cauliflower steaks instead of chicken for a vegetarian version. Sear for 4 minutes per side.
Storage & Reheating
Refrigerator: Store in an airtight container with the glaze for up to 3 days. Freezer: Freeze without the glaze for up to 2 months. Make fresh glaze when reheating. Reheating: Warm gently in a skillet over medium-low heat with a splash of water. The glaze will loosen and coat the chicken again. Microwave on 50% power to prevent the glaze from burning.
What to Serve With Brown Sugar Garlic Chicken
Steamed jasmine rice — essential for soaking up the glaze
Stir-fried broccoli or bok choy
A simple cucumber salad with rice vinegar
Garlic noodles for a full takeout-at-home experience
Roasted sweet potatoes
Nutrition Information
Per serving (2 thighs with glaze): approximately 420 calories, 32 g protein, 18 g carbohydrates, 24 g fat, 0 g fiber. Values are estimates.
Frequently Asked Questions
Can I use boneless skinless chicken thighs?
You can, but the result won’t be as good. The skin provides the crispy texture that contrasts with the sticky glaze. If using boneless, reduce the sear time to 4 minutes per side and watch carefully — they cook faster.
Is this recipe spicy?
Mildly, from the red pepper flakes. You can omit them entirely for a kid-friendly version, or double them if you like heat. The brown sugar keeps it balanced either way.
What if my glaze burns?
The brown sugar can go from caramelized to burnt quickly. If you see the sauce turning very dark or smelling bitter, take the pan off the heat immediately, add 2 tbsp of water, and stir to rescue it. Lower the heat for the remaining cook time.
Can I make the glaze ahead?
Yes. The glaze keeps in the fridge for up to a week. When ready to cook, sear the chicken and pour the cold glaze into the hot pan — it’ll thicken in minutes.
This brown sugar garlic chicken is the recipe you’ll make on repeat all summer. It’s fast, it’s pantry-friendly, and that sticky-sweet glaze is the kind of thing people lick off their plates. Keep it in your back pocket for those nights when you need dinner on the table in 25 minutes flat. Save it now — you’ll thank yourself later.