Red White & Blue Trifle
A stunning red white and blue trifle with layers of pound cake, fresh berries, and whipped cream. No baking required — perfect for Fourth of July.
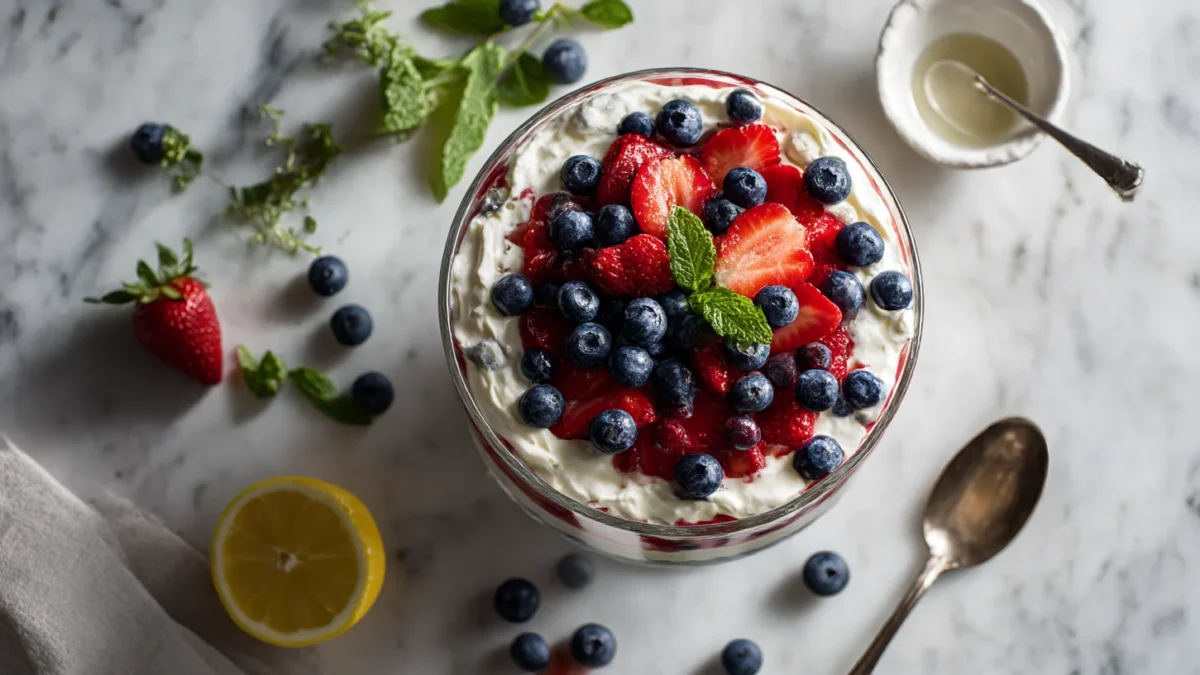
This red white blue trifle is the easiest showstopper you will make all summer. Layers of cubed pound cake, fresh strawberries and blueberries, vanilla pudding, and whipped cream build into a creamy no-bake dessert that looks like it came from a fancy bakery. There is no oven involved — just layering and chilling. It is the kind of recipe that takes 30 minutes of mostly hands-off assembly and disappears within minutes of hitting the table. Perfect for the 4th of July, Memorial Day, or any summer gathering where you need a dessert that feeds a crowd.
Why You’ll Love This Red White Blue Trifle
- No baking required — This is a build-and-chill dessert. Your kitchen stays cool, and you stay out of the oven entirely.
- Make-ahead friendly — It needs at least 4 hours in the fridge to set up, which means you assemble it the morning of your event and forget about it until dessert time.
- Feeds a crowd — One bowl gives you 8 generous servings, and it scales easily if you need to double the recipe for a bigger group.
- Minimal ingredients — Pound cake, berries, pudding, and whipped cream. Most of these are pantry staples or quick-grab items at any grocery store.
- Look impressive, tastes better — The red, white, and blue layers through a glass bowl are genuinely gorgeous, and the texture is everything you want from a trifle: soft cake, creamy pudding, juicy fruit, and pillowy cream.
Ingredients
The hero here is the pound cake. Store-bought works beautifully — Sara Lee or a bakery loaf from your local supermarket saves you time without sacrificing flavor. If you use a dense, buttery pound cake, it soaks up the berry juices and turns into something almost custardy by the time you serve it. One 10-ounce loaf give you more than enough cubes for the layers.
- 1 loaf (about 10 oz) pound cake (store-bought is fine; cut into 3/4-inch cubes)
- 1 1/2 pints fresh strawberries (hulled and sliced, plus a few extra for garnish)
- 1 pint fresh blueberries (washed and dried)
- 1 box (5.1 oz) instant vanilla pudding mix (the cook-and-serve kind sets up firmer, but instant works too)
- 3 cups whole milk (for the pudding)
- 2 cups heavy whipping cream (cold, straight from the fridge)
- 1/4 cup powdered sugar (for sweetening the whipped cream)
- 1 teaspoon vanilla extract
- 2 tablespoons granulated sugar (for macerating the strawberries)
- 1 tablespoon lemon juice (brightens the berries)
Equipment
- Trifle bowl (3-quart glass bowl) or 8 individual serving glasses
- Stand mixer or hand mixer with a whisk attachment
- Large mixing bowls (2)
- Sharp knife and cutting board
- Offset spatula or large spoon for layering
- Plastic wrap for covering
- A clear glass trifle bowl makes the layers visible, which is half the point
How to Make Red White Blue Trifle
Step 1 — Make the pudding base
Whisk the instant vanilla pudding mix with 3 cups of cold whole milk in a large bowl. Whisk continuously for 2 minutes until it starts to thicken. It will look slightly thin at first — give it 5 minutes on the counter and it will set to a creamy, pudding-like consistency. If you are using cook-and-serve pudding, follow the package instructions on the stovetop, then transfer to a bowl, press plastic wrap directly onto the surface (this prevents a skin), and let it cool to room temperature. Do not put warm pudding into the trifle — it will melt the whipped cream and make everything slide.
Step 2 — Whip the cream
Pour the cold heavy whipping cream into the bowl of a stand mixer fitted with the whisk attachment (or use a hand mixer). Whip on medium speed until soft peaks form, about 2 minutes. Add the powdered sugar and vanilla extract, then continue whipping on medium-high for another 1 to 2 minutes until you get stiff peaks. Stop before it looks grainy — over-whipped cream turns to butter and you will have to start over. You should have about 4 cups of whipped cream. Set aside 1 cup for the top layer.
Step 3 — Macerate the strawberries
Toss the sliced strawberries with 2 tablespoons of granulated sugar and 1 tablespoon of lemon juice. Let them sit for 15 to 20 minutes at room temperature. The sugar draws out the berry juices and creates a light syrup that soaks into the pound cake cubes and gives the red layers real strawberry flavor, not just color. Do not skip this step — plain sliced berries taste flat compared to macerated ones.
Step 4 — Cut the pound cake
Cut the pound cake into 3/4-inch cubes. You need about 6 cups of cubes. Do not cut them too small — they should be bite-sized but sturdy enough to hold their shape as they absorb the berry juices and pudding. If your cake is slightly stale, even better. Day-old cake absorbs liquid better than fresh, and this recipe benefits from a slightly drier cube.
Step 5 — Fold the pudding
Gently fold half of the whipped cream (about 1.5 cups) into the cooled pudding using a spatula. This lightens the pudding layer and makes it silky rather than dense. Use a light hand — you want streaks of cream throughout, not a completely homogenous mixture. Set the remaining whipped cream aside for the top.
Step 6 — Layer the trifle
In your trifle bowl or individual glasses, build the layers in this order: First, a layer of pound cake cubes, covering the bottom of the bowl. Spoon about one-third of the macerated strawberries and their syrup over the cake. Add half of the lightened pudding mixture, spreading gently with an offset spatula. Next, add a layer of blueberries — just enough to cover the pudding. Add another layer of pound cake cubes. Spoon the remaining strawberries over the cake. Add the rest of the pudding mixture. Top with a final layer of pound cake cubes, pressing down very lightly. Finish with the reserved 1 cup of whipped cream, spread to cover the top completely. Garnish with a few whole strawberry slices and a handful of blueberries arranged in a flag-style pattern if you are feeling festive.
Step 7 — Chill and serve
Cover the trifle tightly with plastic wrap and refrigerate for at least 4 hours, preferably overnight. This resting time lets the cake cubes absorb the berry juices and pudding, the layers set, and the flavors meld together. After 4 hours the trifle will slice cleanly. After 8 hours it is even better — the cake becomes custard-like and the colors bleed together just enough to look beautiful. Serve cold with a big spoon.
Pro Tips
Do not assemble this trifle in a warm kitchen. If the bowl or ingredients are warm, the whipped cream will defrost and the layers will slide. Chill your bowl and your mixing beaters in the freezer for 10 minutes before whipping the cream.
If you want cleaner red-white-blue layers instead of mixed berry layers, keep the strawberries strictly in the bottom third of the bowl, the pudding and cream in the middle, and the blueberries on top. But honestly, the mixed version of this red white blue trifle tastes better and still looks stunning.
For individual servings, use clear glasses or mason jars — 8-ounce wide-mouth jars work perfectly. Layer in the same order and let them chill for at least 3 hours. Individual red white blue trifle cups are easier to serve and transport than slicing from one giant bowl.
If your pound cake is very moist and fresh, toast the cubes in a single layer on a sheet pan at 300 F for 8 minutes. Let them cool completely before layering. The slight dryness helps them hold up better over the chilling time and gives you more distinct layers.
Rubbing a cut strawberry around the rim of the serving bowl before you start layering gives the bowl a subtle berry fragrance. It is a small thing, but it makes the whole presentation feel more intentional.
Variations & Substitutions
Gluten-free
Use a gluten-free pound cake (many supermarkets carry one in the bakery section, or make a simple GF version with a GF flour blend). Everything else in the recipe is naturally gluten-free. Double-check your pudding mix — some brands contain barley malt, which is not GF. Jell-O brand instant vanilla pudding is labeled gluten-free.
Boozy version for adults
Brush the pound cake cubes with 2 tablespoons of Chambord (raspberry liqueur) or amaretto before layering. You can also fold 1 tablespoon of vanilla liqueur into the whipped cream. The alcohol flavor is subtle but it makes the trifle feel grown-up and pairs beautifully with the berries. Still totally fine to serve to kids if you skip the liquor — the base recipe is rich enough on its own.
Different fruits
Raspberries instead of strawberries for the red layer — they break down more and create a beautiful jammy texture. Blackberries or red grapes can stand in for blueberries. For a non-flag version of this red white blue trifle recipe, try peach and blueberry in the summer, or pear and cranberry in the fall. Just keep the 2:1 ratio of red-fruit juice to blue-fruit visual weight.
No-whipped-cream shortcut
Swap the homemade whipped cream for one 8-ounce tub of thawed Cool Whip. Honestly, for a casual cookout, nobody will notice. The texture is slightly less rich but the flavors are the same. Use the Cool Whip to fold into the pudding as described in step 5.
Storage & Reheating
Cover the trifle tightly with plastic wrap pressed against the surface of the whipped cream. It keeps in the refrigerator for up to 2 days. After day two, the cake cubes get overly soft and the pudding starts to weep, so plan to serve it within 48 hours of assembly.
Do not freeze this trifle. The whipped cream and pudding separate when thawed, turning grainy and watery. If you need a make-ahead dessert, prep the components separately — make the pudding, wash and slice the berries, cut the cake cubes, and whip the cream. Store each in its own container in the fridge for up to a day, then assemble the morning of your event.
Any leftovers (if you have leftovers, which is doubtful) should be eaten within 24 hours for the best texture. The whipped cream may weep slightly on day two but it is still perfectly good.
What to Serve With Red White Blue Trifle
A scoop of homemade vanilla bean ice cream on the side — the contrast between cold ice cream and the creamy trifle is excellent
A pitcher of strawberry lemonade or a sparkling berry punch to drink alongside
For a crowd, set out a flag fruit platter with the same red, white, and blue theme before dessert comes out
A drizzle of warm chocolate sauce over each serving for a dramatic finish
Vanilla wafers or shortbread cookies on the side for anyone who wants something crunchy alongside the soft trifle
Nutrition Information
Per serving (1 cup):
Frequently Asked Questions
Can I make this the night before?
Absolutely. This is actually the ideal make-ahead dessert. Assemble it the night before (or up to 8 hours before serving), press plastic wrap against the surface, and refrigerate. The cake cubes soften into a custard-like texture, which is exactly what you want. Any longer than 8 hours and the whipped cream may start to weep, but it will still taste fine.
What if I do not have a trifle bowl?
Any clear glass bowl works — a large salad bowl, a punch bowl, or even a clear storage container. The visual appeal comes from seeing the layers through glass, so clear is better than ceramic. You can also use a regular mixing bowl and just serve it family-style with a big spoon in the center. It will taste the same no matter what you put it in.
Can I use frozen berries instead of fresh?
For the strawberry layer, thaw frozen sliced strawberries completely and drain the excess liquid before macerating. They will be softer and more like jam than fresh fruit slices, which works fine. For the blueberry layer, frozen blueberries work as-is — they will thaw in the fridge during chilling and bleed a little color into the pudding, which actually looks nice.
My layers are sliding apart. What went wrong?
Two likely causes: either your pudding was still warm or too thin when you layered it, or you did not chill the trifle long enough. Thin pudding liquefies the layers. Make sure your pudding is fully set (at least 5 minutes after whisking) before layering, and chill the finished trifle for at least 4 hours. If it slides anyway, pat the top dry with a paper towel and add an extra layer of whipped cream to seal it.
Can I use store-bought pudding cups instead of making pudding?
Six to eight snack-size pudding cups (about 3.5 oz each) will give you roughly the equivalent of one batch of homemade pudding. Spoon them into a bowl and stir to break up the texture before folding in the whipped cream. It works in a pinch but homemade from a mix has a better consistency for layering — store-bought cups tend to be too firm to spread evenly.
How do I make this dairy-free?
Use a dairy-free pound cake, coconut milk pudding (made with a dairy-free pudding mix and full-fat coconut milk), and coconut whipped cream (the kind sold in a can, like So Delicious brand). Dairy-free whipped cream is less stable than dairy, so whip it just before layering and serve within 12 hours for the best texture.
This red white blue trifle is the kind of dessert that earns compliments without earning you a day in the kitchen. Thirty minutes of layering, a few hours in the fridge, and suddenly you are the person who brought the stunning dessert to the cookout. The pound cake soaks up berry juice and turns custardy, the whipped cream stays pillowy on top, and every spoonful has a little bit of everything. Make it for the Fourth, make it for a birthday, make it because it is Tuesday. You will be glad you did.